How to Build a Gaming Rig
Outperform the competition by building your own gaming rig.

Every day you can bear witness to individuals playing games on various systems—phones, handhelds, and even consoles; however, none of these even begin to compare to the power of a gaming rig. A gaming rig is a personal computer (PC) that specializes in the components to deliver great performance and a superb gaming experience.
Before you can get started piecing together your gaming rig, you have to conduct research to ensure you are choosing the proper components. You're going to have to check the websites of manufacturers to ensure their parts are compatible with other components. Following are the parts, and a brief description of them, that you'll be needing to build a gaming rig.
The Case

At first, the computer case may seem like an obvious choice. You just choose a style and a color, right? Wrong! You need to look at the features of the case—the dimensions, compatibility with your cooling system, and motherboard form factor support. If you get a case that's too small, you won't be able to fit everything into it. If you get a case with no support for liquid cooling, you may have some difficulty installing your liquid cooling system.
The Hard Disk/Solid State Drive

Hard Disk Drives (HDD) and Solid State Drives (SSD) are the permanent storage of your PC. There are some differences between HDDs and SSDs. First off, HDDs are slower but much cheaper than SSDs. HDDs also utilize mechanical components to read and write data, whereas SSDs use electricity, making them quieter. Choose which storage medium suits you best, and then take a look at the storage capacity. Terabytes (TB) are larger than gigabytes (GB), so keep that in mind.
The Motherboard

Ah, the motherboard—the most important (arguably) component of PCs, let alone gaming rigs. The motherboard acts as a relay for the various components. Motherboards come in various sizes (form factors). The most common form factor is ATX (Advanced Technology Extended) or mATX (micro-Advanced Technology Extended). As the name suggests, mATX motherboards are smaller, and typically provide less “slots” to connect components.
The Random Access Memory
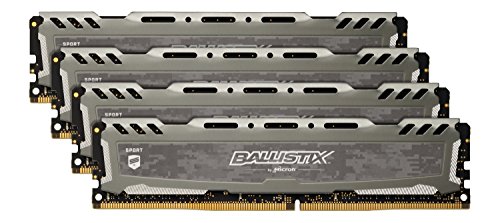
Random Access Memory (RAM) is a vital part of any computer. RAM holds temporary information for the computer that is needed by the CPU. It's a good idea to have at least 8 gigabytes (GB) of RAM for a gaming rig. RAM is not backwards compatible, so ensure your motherboard, CPU, and RAM all support each other.
The Central Processing Unit
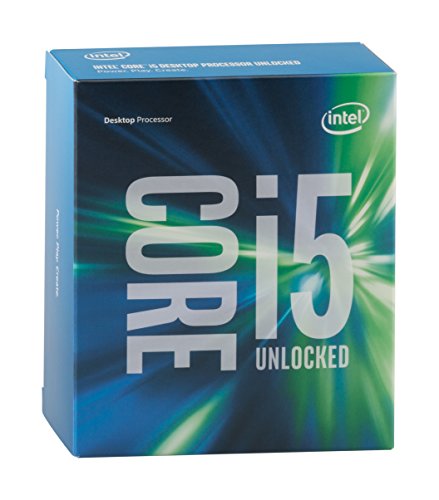
The Central Processing Unit (CPU) is responsible for interpreting and executing various commands for the computer. When choosing a CPU, there are a few things you need to keep in mind—the Thermal Design Power (TDP—how much heat the CPU will typically need to be dissipated by the cooling system of the computer), the cache size (essentially a small, very quick temporary memory storage to speed up processing), the bit architecture (32/x86 or 64/x64-bit processing, always aim for 64-bit if possible—it makes use of more RAM), and the socket type (you must ensure that the socket on your CPU and the CPU socket on your motherboard match. Make sure to check the manufacturer's website to ensure the parts are compatible with one another). If your CPU does not come with a CPU cooler, it is very important that you acquire one, in addition to thermal paste (this evenly disperses the heat from the CPU to the CPU cooler).
The Graphical Processing Unit
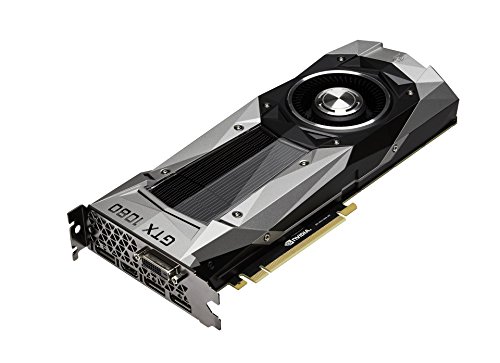
The Graphical Processing Unit (GPU), also known as “the video card,” operates at great speed to quickly interpret, execute, and relay data to various components. Typically, GPUs offer various output ports, and it is important to make sure that your GPU has ports that fit your needs, such as HDMI or DVI ports for your monitor(s).
The Power Supply Unit
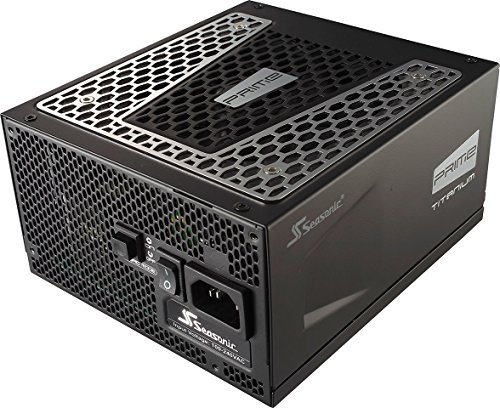
Based on the name, it should be pretty obvious what the purpose of the Power Supply Unit (PSU) is. The biggest things to take note of when choosing a PSU include: wattage and modulation type. Wattage is the amount of power the PSU will provide the computer—make sure to never skimp on the power! A computer can be badly damaged if not enough power is supplied to it. There is a rule of thumb to aim for about 30 percent more wattage than your computer requires, as PSUs will weaken over time. Modulation of a PSU is, quite simply, whether extra cables can be safely removed or not. This plays a big part in airflow—you want the computer to be able to “breathe” without much effort.
Cooling Systems
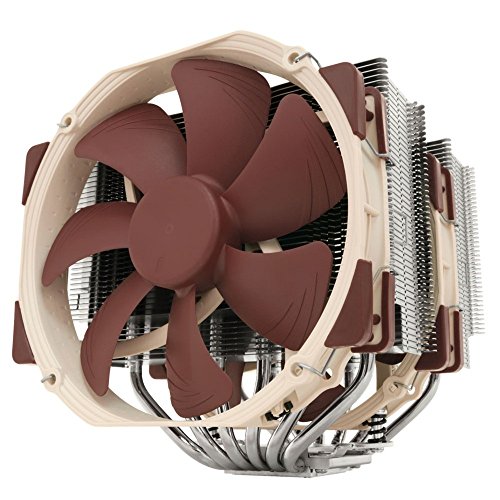
Now is the time to decide whether you want to use airflow or liquid to cool your system. A liquid system is more expensive, but is far more effective. Airflow requires very little setup, and it is cheap. If using air-based cooling, you need to look at the size of the fans, the revolutions per minute (RPM) of the fans, the lifespan of the fans, and the cubic feet per minute (CFM) of the fans—this tells you how many cubic feet of air the fan can remove in one minute.
The Building Process
Firstly, you should read through the manuals of your components and any other equipment you will be using, such as anti-electrostatic discharge equipment (this greatly reduces the risk of damaging components with static electricity).
When you have a good understanding of the components, install the RAM into the designated slots on the motherboard. The RAM slots (also called Dual-Inline Memory Module slots) are typically on the right side of the motherboard. These slots can be color-coded to represent multi-channel capabilities. By placing RAM in same-colored slots, you can increase the efficiency of your RAM. Installing the RAM should be quite easy, most systems simply require to push back the locking pins, and pushing the RAM gently in with even pressure until the locking pins come back up and lock the RAM in place.
After installing the RAM, go ahead and install the CPU. Most systems require you to undo a locking mechanism before placing the CPU into the slot as designated. Once the CPU is in, follow the instructions from the CPU or CPU Cooler manual to successfully install the CPU Cooler.
Once the CPU and CPU Cooler are installed, go ahead and open your computer case. Install the motherboard placement pins into your computer case. Then, install the Input/Output Shield (I/O Shield) onto the back of your computer case. Refer to your computer case manual if required. Finally, place the motherboard into the computer case and secure it to the motherboard placement pins, usually by screwing it into place.
Go ahead and install the GPU onto your motherboard; the Peripheral Component Interconnect Express (PCIe) slots—where you will most likely be installing the GPU—are typically on the lower area of your motherboard. You may have to remove a back panel on your computer case to allow your GPU to connect properly, if so, ensure to secure your GPU to the computer case as stated in your GPU or Case manual.
Place your PSU into the case and secure it as directed by the manual. Continue by connecting the various cables from the PSU to the motherboard, according to the motherboard's manual. Most cables are already labeled, so you should be able to quickly figure out where everything connects to.
After installing the Power Supply, take a minute to set up your cooling system and storage mediums according to the manuals. For air-cooling systems, you typically install the fan to one of the many fan installation areas of your case by screwing it in. As for your storage devices, you typically just slide them into a locking mechanism or screw them into a holding bay inside the case. Make sure to connect the cables for your storage devices and your fans to the appropriate areas on the motherboard and/or PSU.
Testing
Go ahead and double-check all the connections of your computer to ensure they are secure and in the right spot. Look at the back of the PSU, ensure it is set to provide power to the computer (it is usually a switch that shows an “I” or “1”). If your PSU supports dual-voltage, ensure that your PSU is set to the correct voltage standard for your country (the United States of America uses 120V, Great Britain uses 230V, etc).
Once you have confirmed everything is properly connected inside your gaming rig, go ahead and plug in the peripherals—monitors, mice, keyboard, speakers, etc. Afterward, go ahead and plug in the system and power it on. If everything was successful, you should arrive to a seemingly plain screen with some text, usually a black background and white text. If not, I suggest checking everything again—was a cable unplugged, was a cable in the wrong spot? If nothing else, contact the manufacturers to try to determine the problem; however, if the screen did pop up, congratulations on building your gaming rig!